NVIDIA Inspector Best Settings
Maximize your gaming performance with these expert-recommended NVIDIA Inspector settings. Use them as a practical starting point, then fine-tune based on your GPU, display, and the games you actually play.
Why Configure NVIDIA Inspector Settings?
While NVIDIA's default settings are designed to work for most users, they're not optimized for maximum gaming performance. By tweaking NVIDIA Inspector settings, you can:
- Reduce input lag by disabling power-limiting modes
- Increase FPS stability with proper frame limiting
- Improve visual clarity by removing image blurring effects
- Optimize per-game profiles without affecting other applications
Complete Best Settings Reference Table
How to Apply Best Settings — Step by Step
- Download and open NVIDIA Inspector
Get it from our download page and run
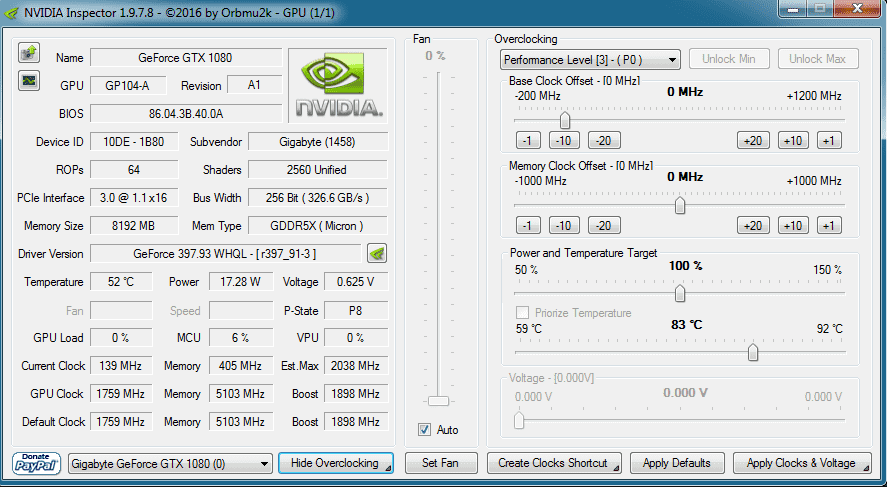
nvidiaInspector.exe— no installation needed. - Click "Show Overclocking"
This opens the overclocking panel showing core clock, memory clock, and shader offsets.
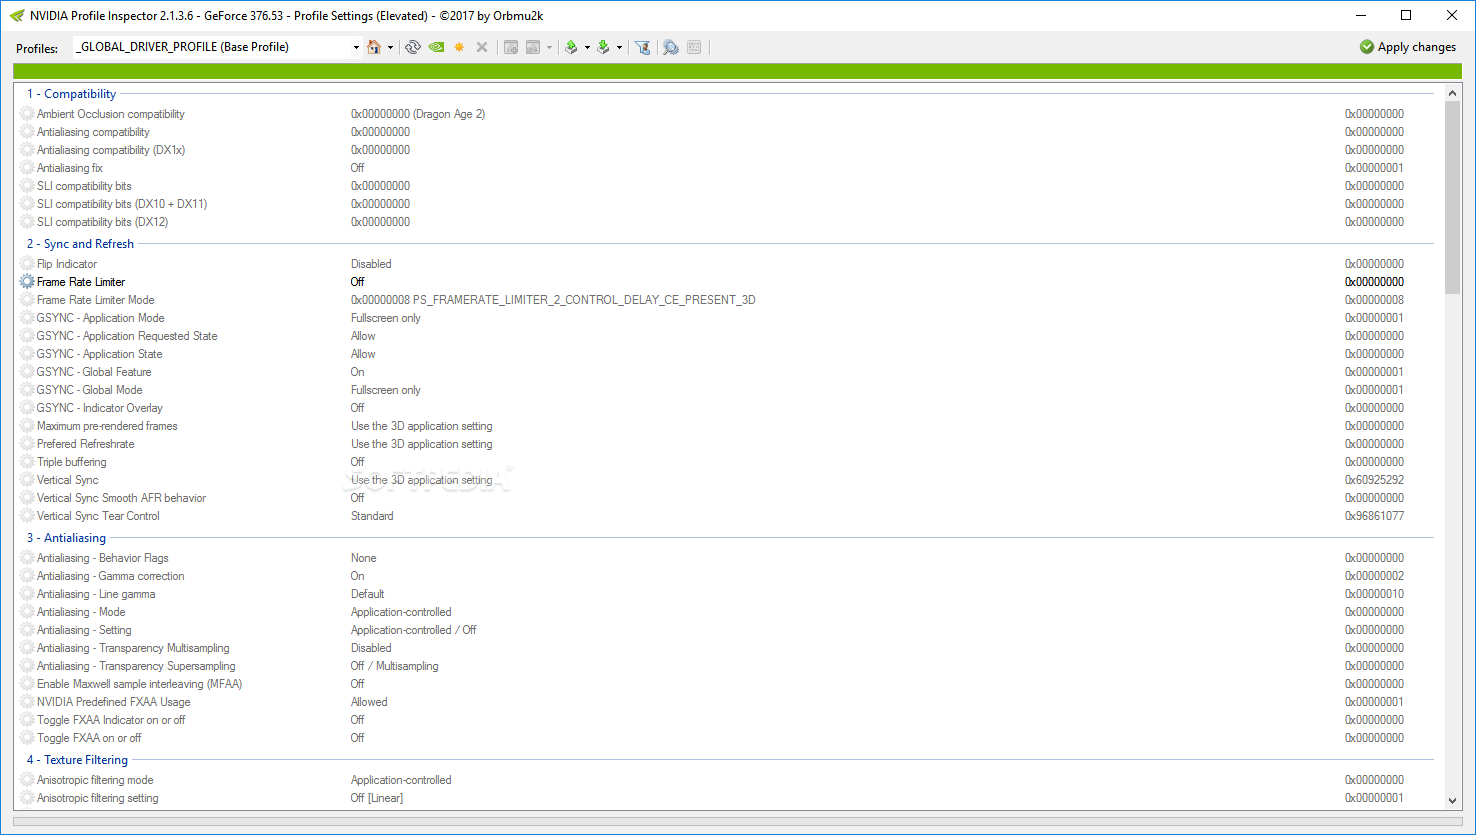
- Open Profile Inspector
Click the profile inspector icon (wrench icon) to open per-game driver profile settings.
- Find your game profile
Use the drop-down to search for your game by name. Most AAA titles have existing NVIDIA profiles.
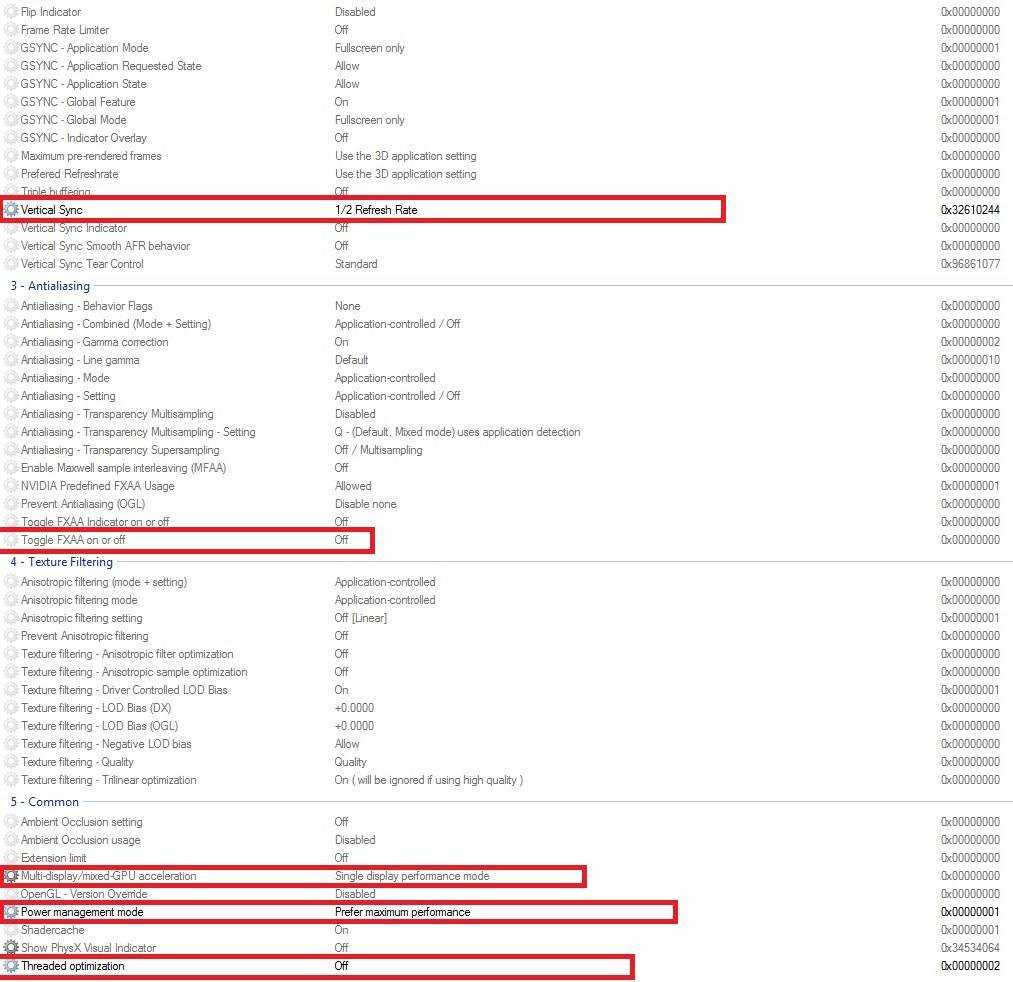
- Apply the recommended settings
Change Vertical Sync, FXAA, Display Mode, and Power Management as shown in the table above.
- Click "Apply Changes" and launch your game
Settings are applied to the NVIDIA driver immediately. No restart required.
- Benchmark and fine-tune
Use a tool like MSI Afterburner to monitor FPS and temperatures. Adjust settings based on real-world results.
Command-Line Overclock Script
For automated overclocking, create a .bat file with these commands. Save it in your NVIDIA Inspector folder and run as Administrator:
SET VOLT=650000
SET MEMORY=500
SET CORE=100

SET GPU0=-lockVoltagePoint:0,%VOLT% -setBaseClockOffset:0,0,%CORE% -setMemoryClockOffset:0,0,%MEMORY%
SET GPU1=-lockVoltagePoint:1,%VOLT% -setBaseClockOffset:1,0,%CORE% -setMemoryClockOffset:1,0,%MEMORY%
SET GPU2=-lockVoltagePoint:2,%VOLT% -setBaseClockOffset:2,0,%CORE% -setMemoryClockOffset:2,0,%MEMORY%

nvidiaInspector.exe %GPU0% %GPU1% %GPU2%Settings Screenshot Reference